 3426115
 2019-07-10
iTunes Flash is Available on 3uTools Now! Here’s the tutorial.
iTunes Flash: Original use iTunes to flash, and the flashing process is fully visualized, and the error can be automatically fixed in the process, or the repair suggestion will be given according to the error code.
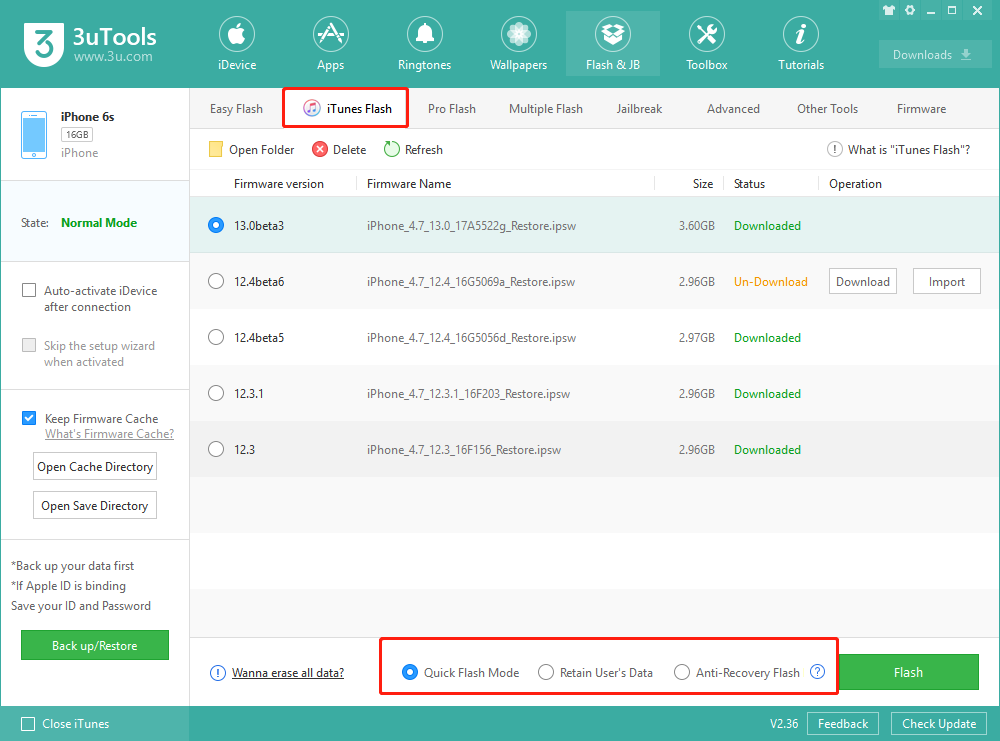
On 3uTools, the iTunes Flash has three modes: Quick Flash Mode, Retain User’s Data and Anti-Recovery Flash.
※ Quick Flash Mode: This mode is suitable for maintenance staff, sales clerk and ordinary users to achieve these goals: update iOS version quickly; clear user data, restore to factory state or try to repair iOS version.
※ Retain User’s Data: This mode is only used to update the iOS version or try to repair the iOS version. All installed applications and user data in the iDevice will be preserved.
※ Anti-Recovery Flash: This mode is suitable for people who want to sell their own iDevice or want to destroy the private data inside the iDevice. Because each memory unit of the hard disk chip in the iDevice need to be formatted, the flashing speed will be very slow and take up to several hours.
Precautions:
※1. Please backup the important data before flashing, or check the box “Retain User’s Data” to prevent the loss of important data;
※2, please make sure that the iDevice has closed the activation lock, or know the ID lock account and password. Otherwise, the iDevice may not be activated after flashing.
Whether using 3uTools or iTunes to flash, the purpose is the same. In response to the needs of the majority of users, now 3uTools embedded in the iTunes Flash function, here’s the tutorial how to use iTunes Flash.
Quick Flash Mode
Step 1: First download and install the latest version of 3uTools, connect the iDevice to the computer with a USB cable;
Go to Flash & JB → iTunes Flash, when connection succeeds will automatically match the flash firmware.
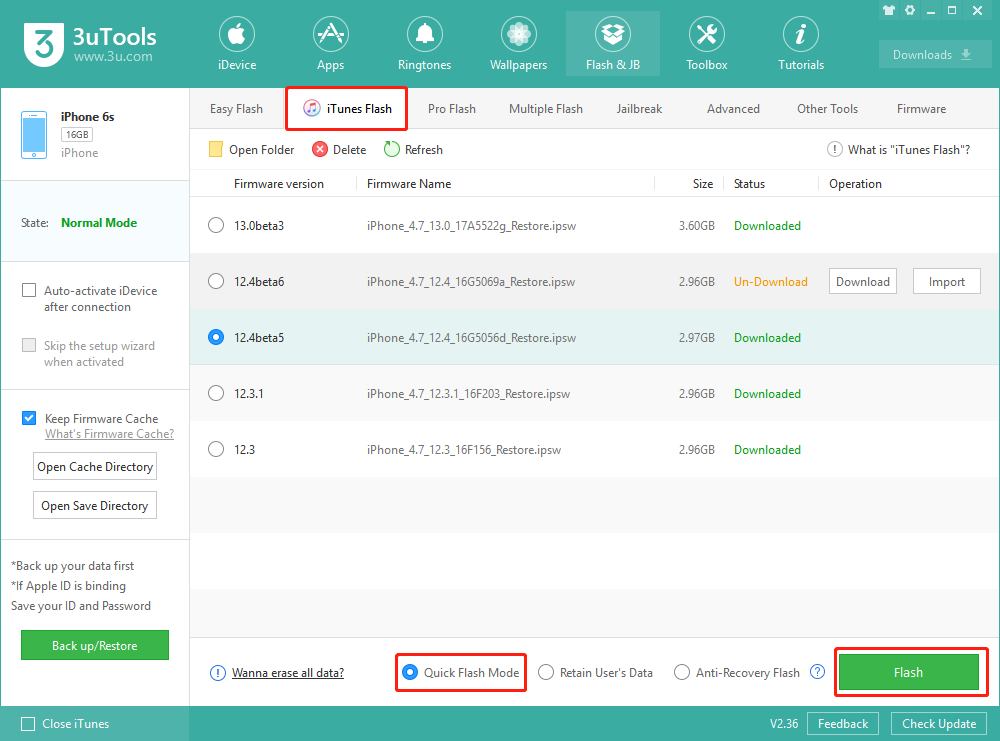
Step 2: Select the iOS version you want to flash in the available version, select “Quick Flash Mode” below, and then the iTunes flash reminder will pop up. After reading it carefully, click “Flash”.
If you have already downloaded the firmware, you can click "Import" and then click "Flash".
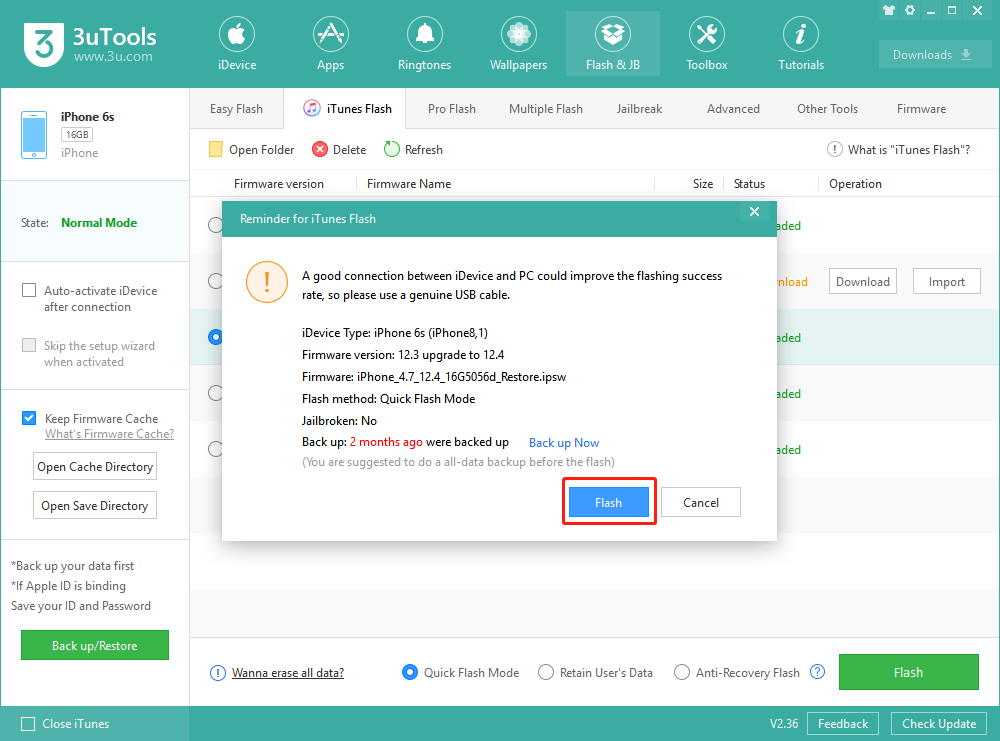
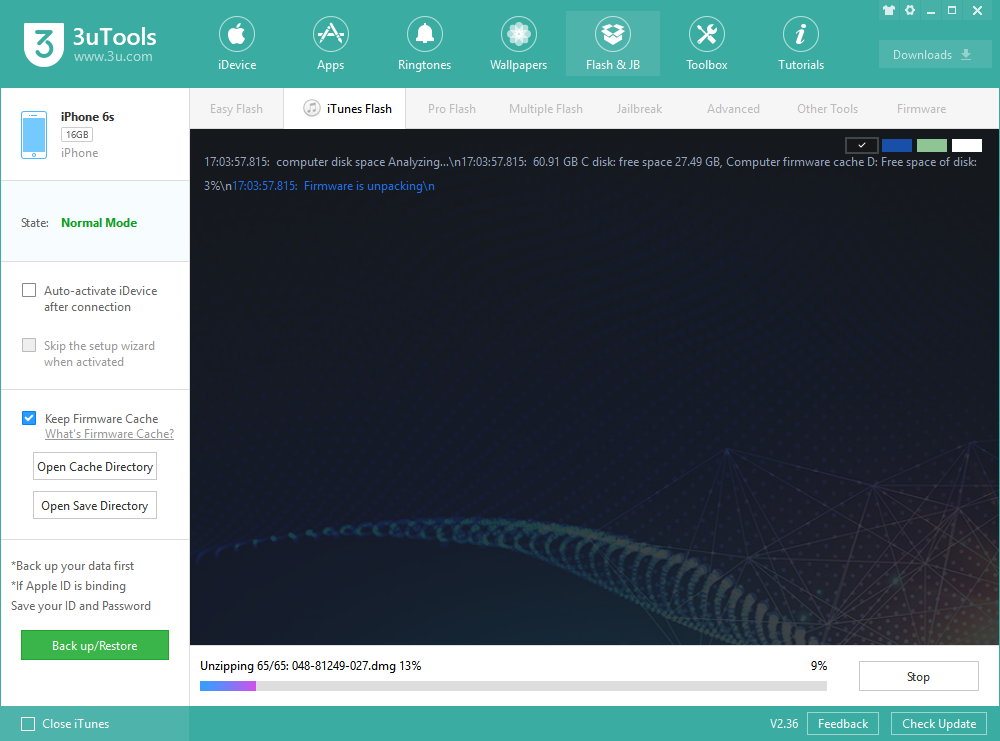
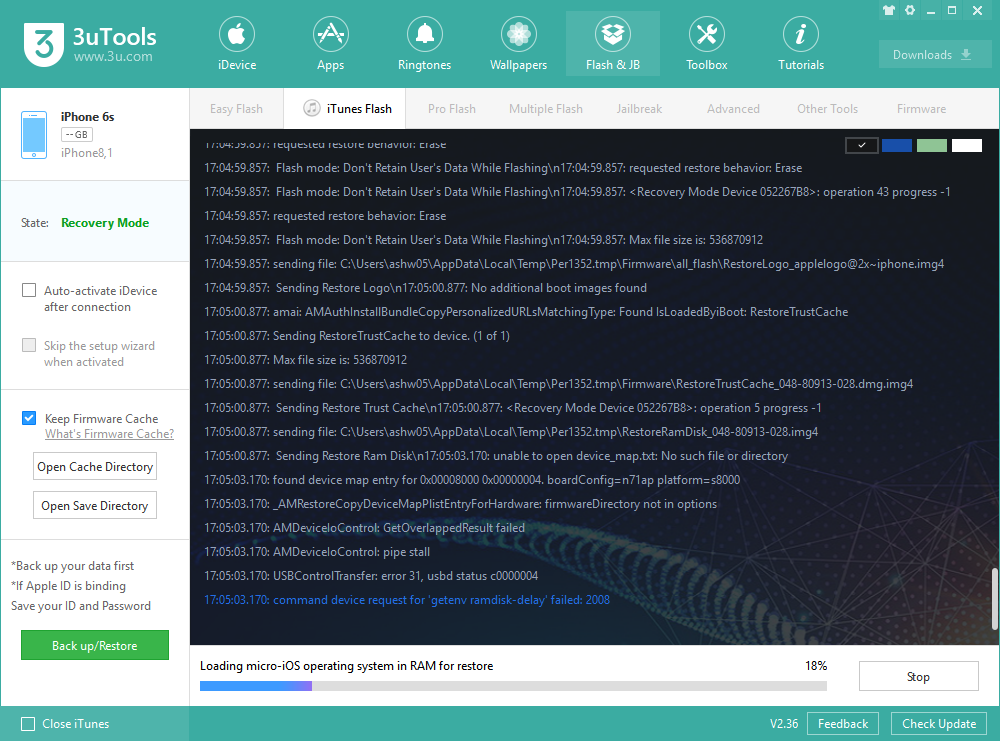
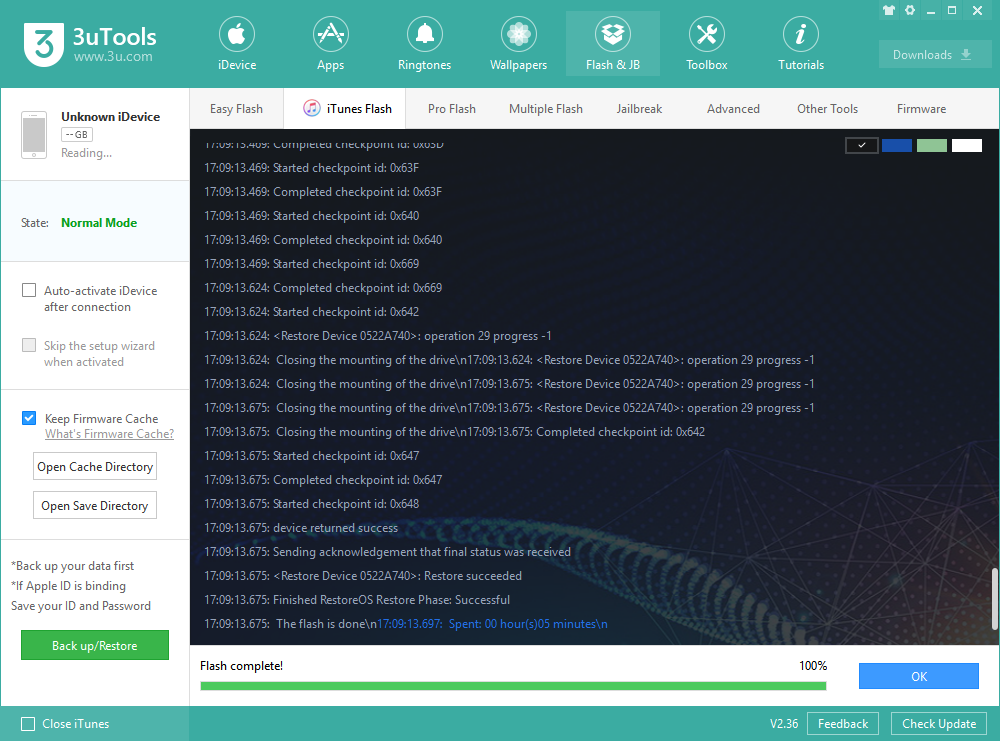
Step 3: Then the flash will be automatically carried out, please do not unplug the USB cable, waiting for the flash to complete. (The iDevice will automatically turn on after the flash is finished)
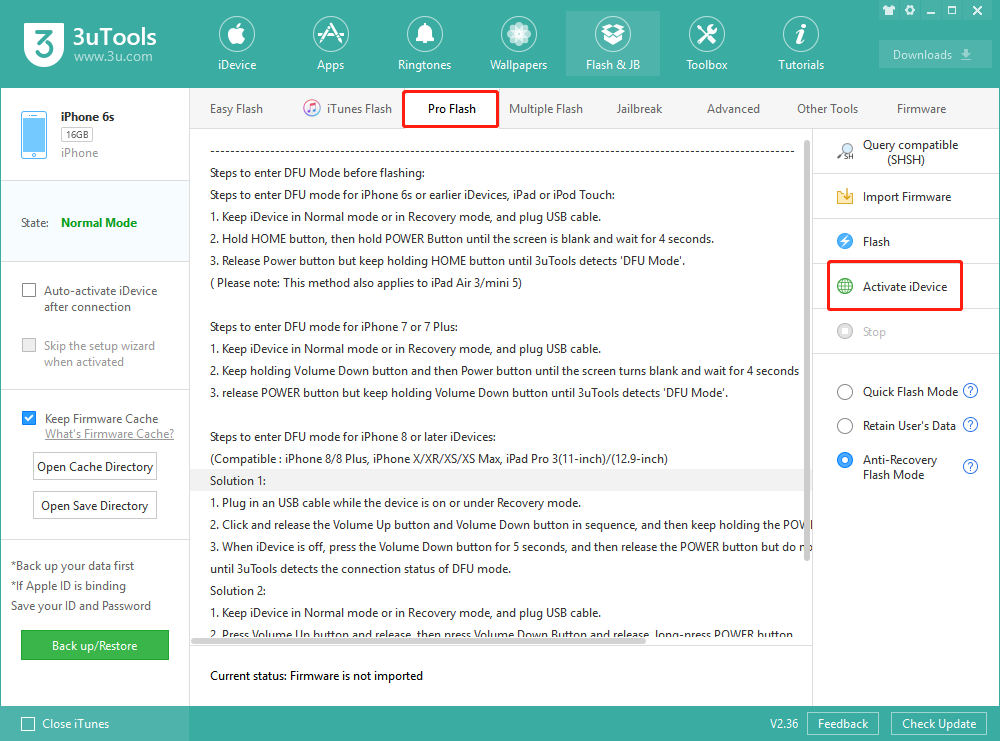
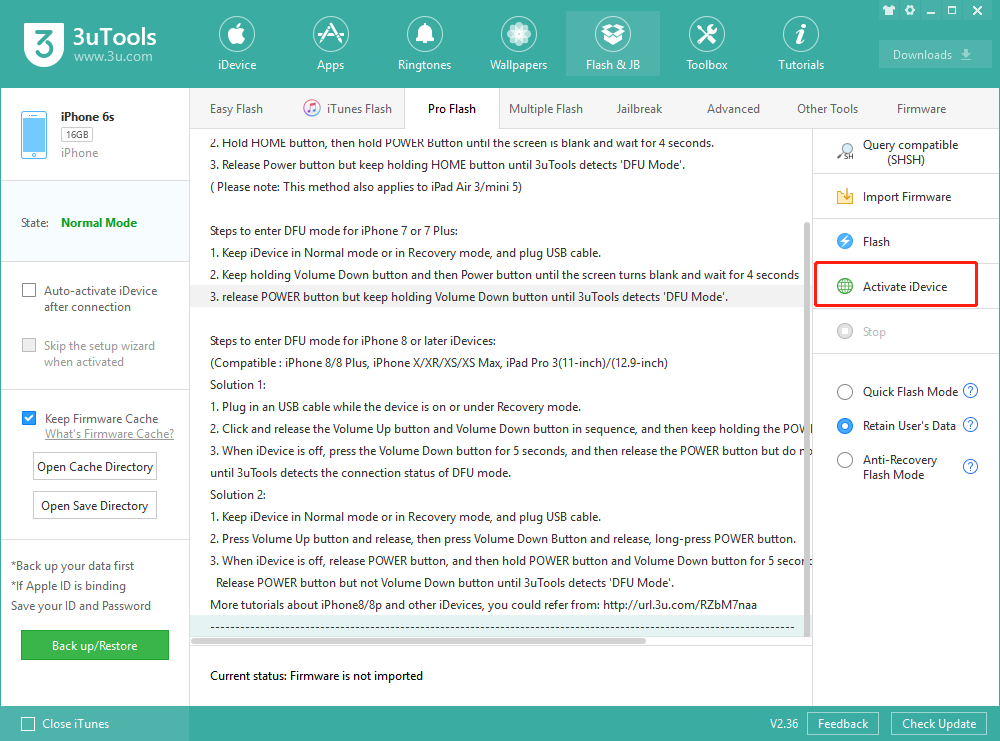
Step 4: After the iDevice is turned on, click “Pro Flash - Activate iDevice” to activate it. You can also activate it manually on the iDevice.
Retain User’s Data
Step 1: First download and install the latest version of 3uTools, connect the iDevice to the computer with a USB cable; Go to Flash & JB → iTunes Flash, when connection succeeds will automatically match the flash firmware.
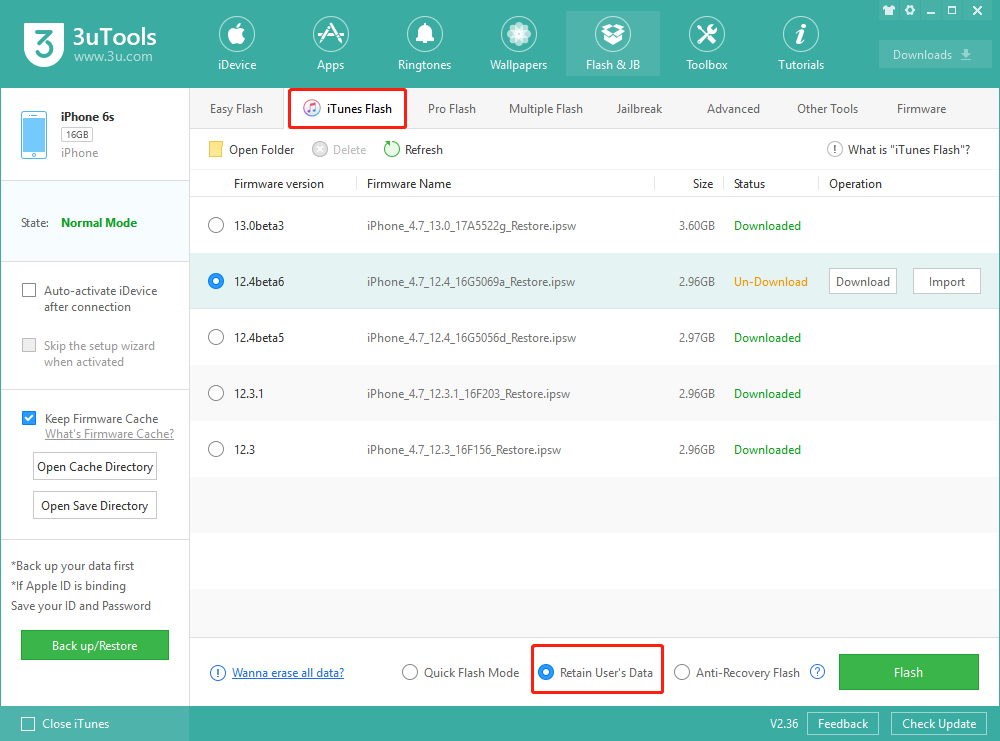
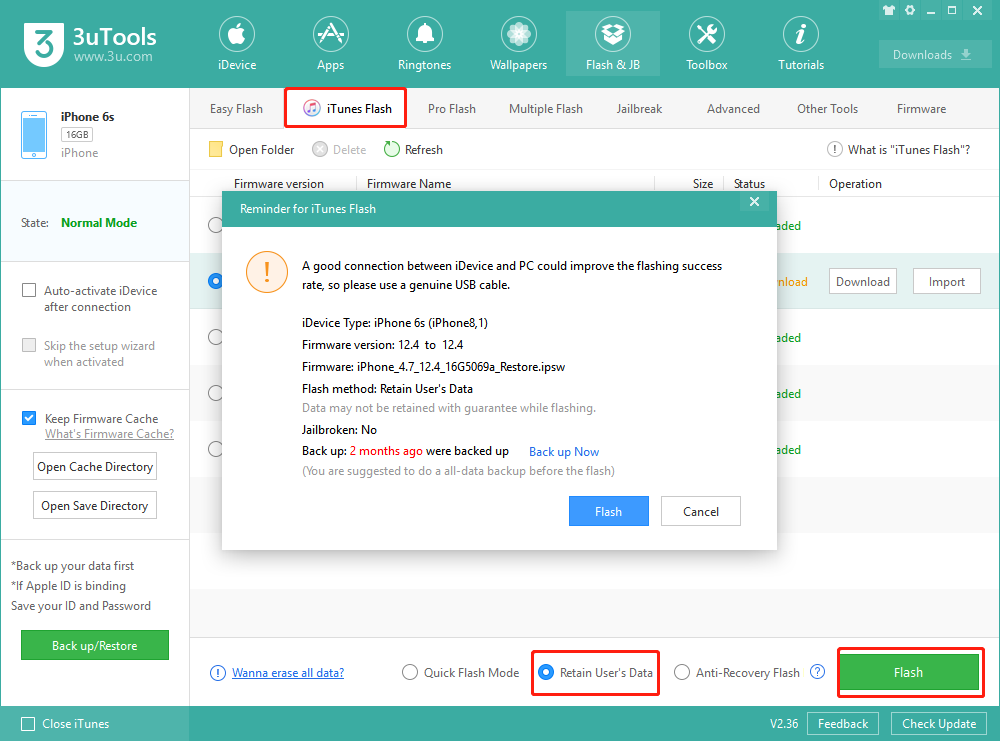
Step 2: Select the iOS version you want to flash, and select “Retain User’s Data” box, Click “Flash”, then you will jump to the following interface, click “Flash” again.
If you have already downloaded the firmware, you can click "Import" and then click "Flash".
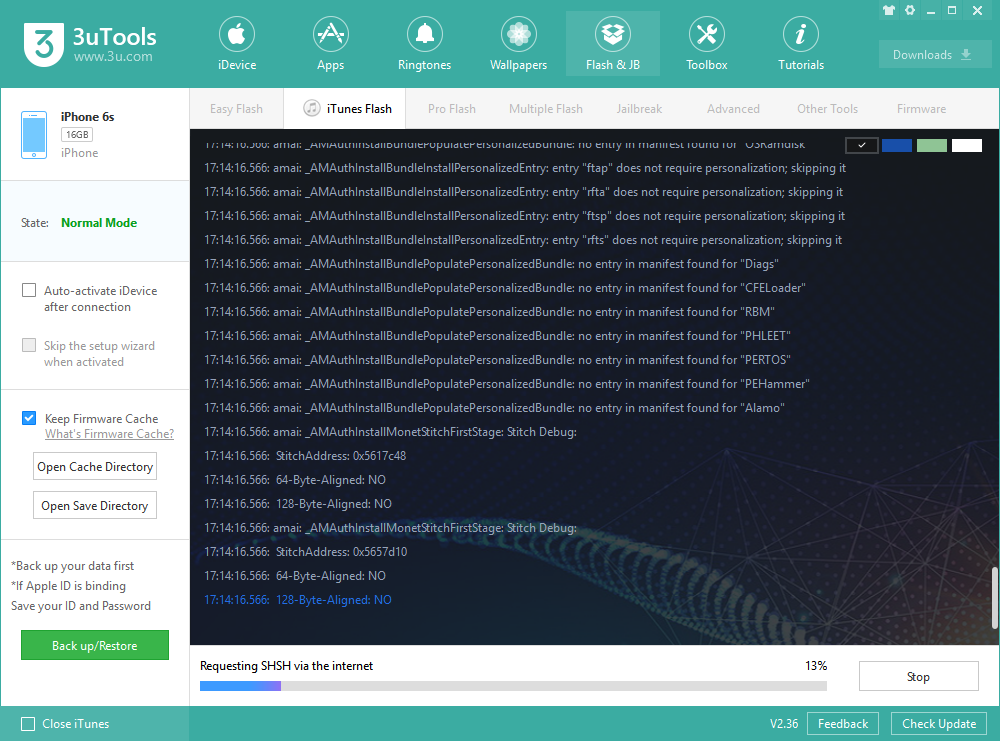
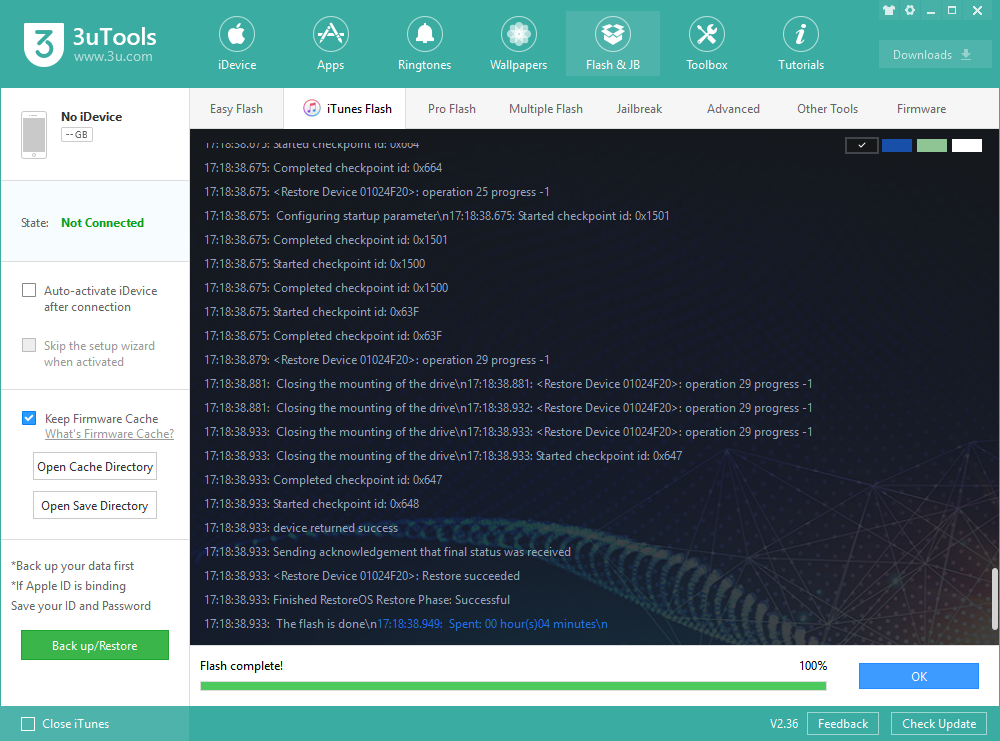
Step 3: Then the flash will be automatically carried out, please do not unplug the USB cable, waiting for the flash to complete. (The iDevice will automatically turn on after the flash is completed, and Retain User’s Data does not need to be activated.)
Step 1: First download and install the latest version of 3uTools, connect the iDevice to the computer with a USB cable; Go to Flash & JB → iTunes Flash, when connection succeeds will automatically match the flash firmware.
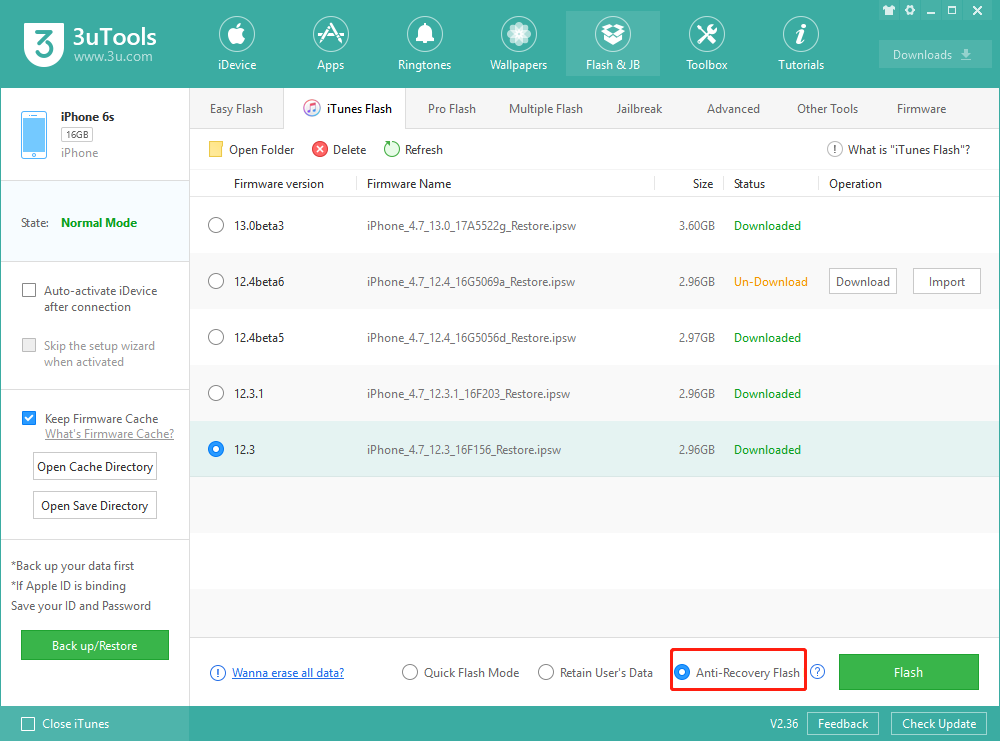
Step 2: Select the iOS version you want to flash, and select “Anti-Recovery Flash” box, Click “Flash”, then you will jump to the following interface, click “Flash” again.
If you have already downloaded the firmware, you can click "Import" and then click "Flash".
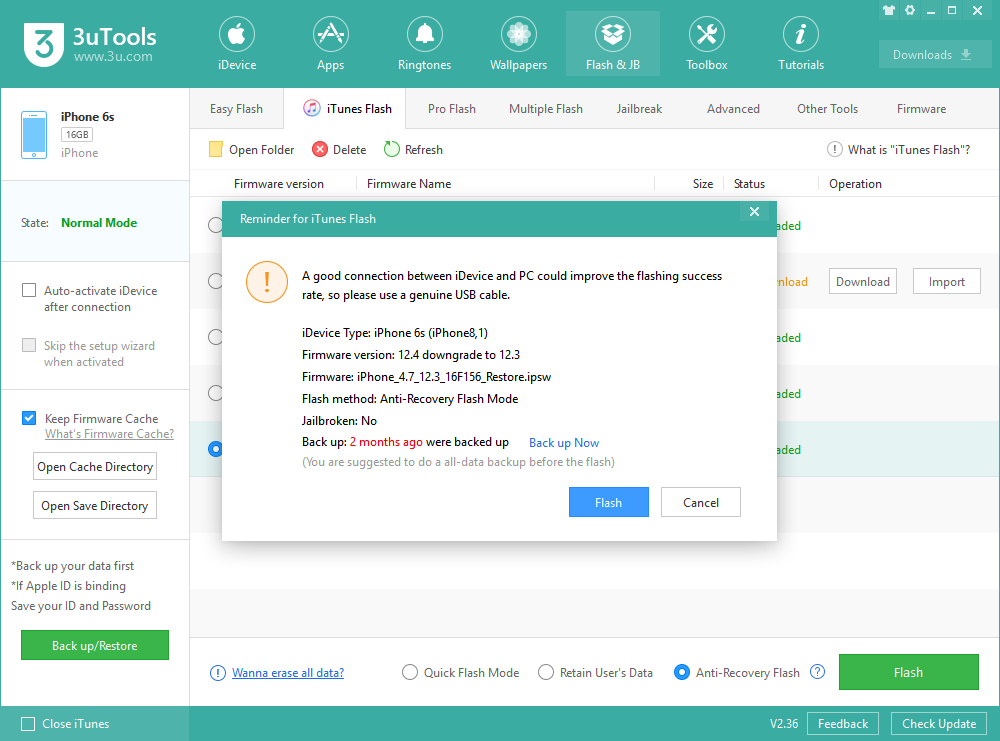
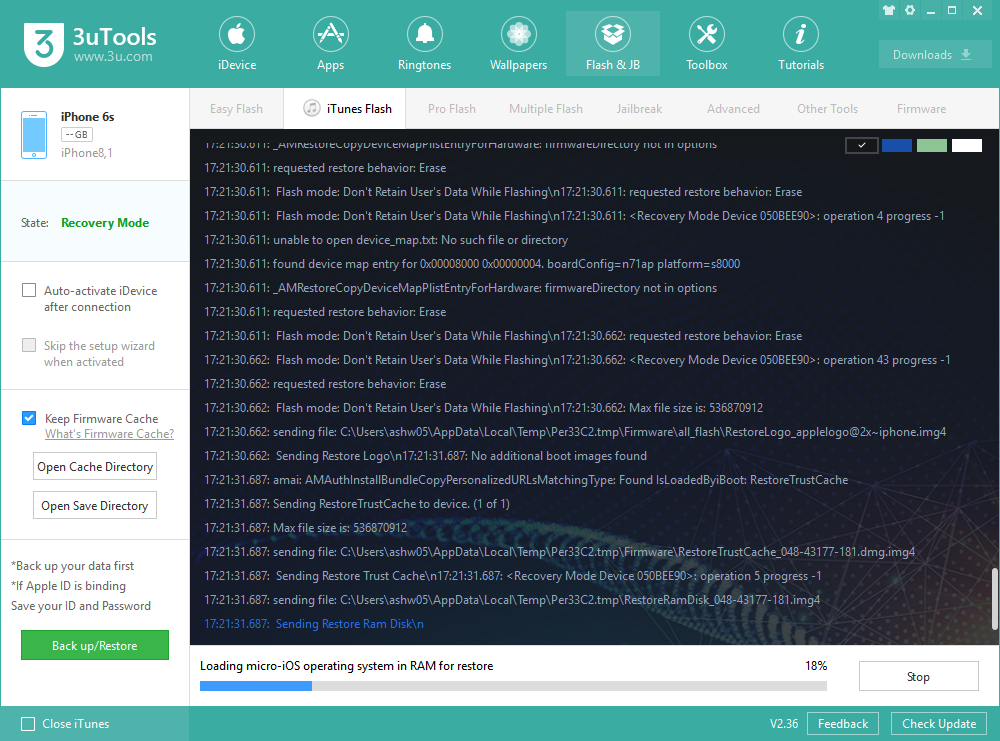
Step 3: Then the flash will be automatically carried out, please do not unplug the USB cable, waiting for the flash to complete. (The Anti-Recovery Flash will take a long time, then iDevice will automatically turn on after the flash is completed.)
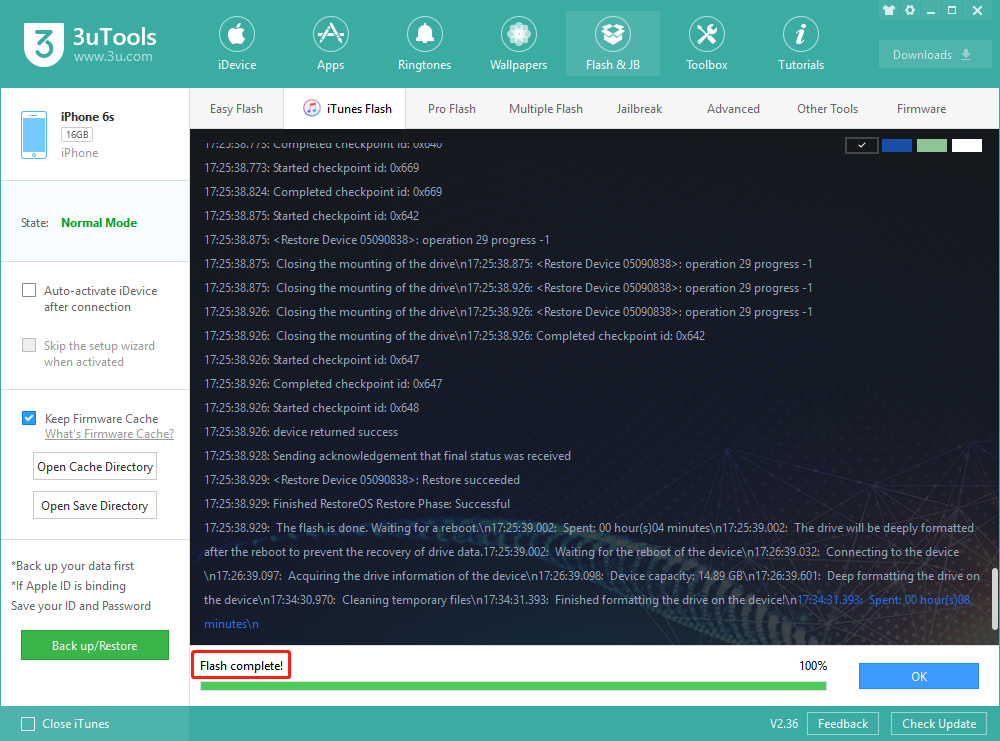
Step 4: After the iDevice is turned on, click “Pro Flash - Activate iDevice” to activate it. You can also activate it manually on the iDevice.
