 511321
 2019-01-23
You're able to connect your iDevice to 3uTools via Wi-Fi network if both of your computer and iOS device are under the same Lan.
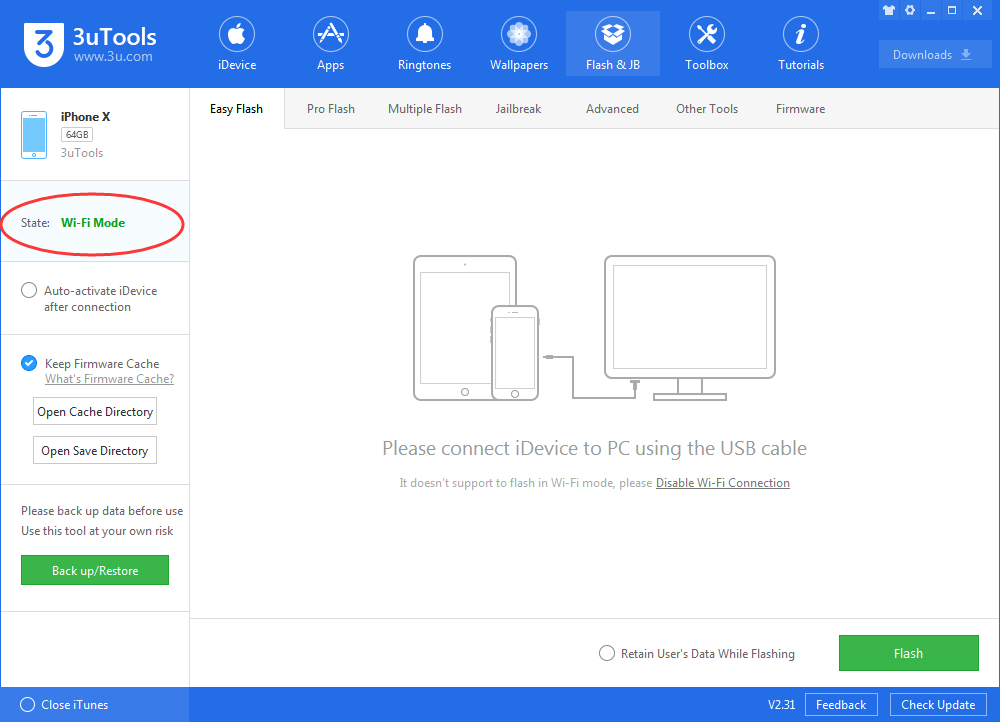
After connecting iDevice to 3uTools via Wi-Fi network, you can manage Apps, Photos, Ringtones, Videos, Contacts, Notes, Backup/Restore iDevice and manage other data, while you're not supported to flash, jailbreak and use some advanced features.
How to activate Wi-Fi connection?
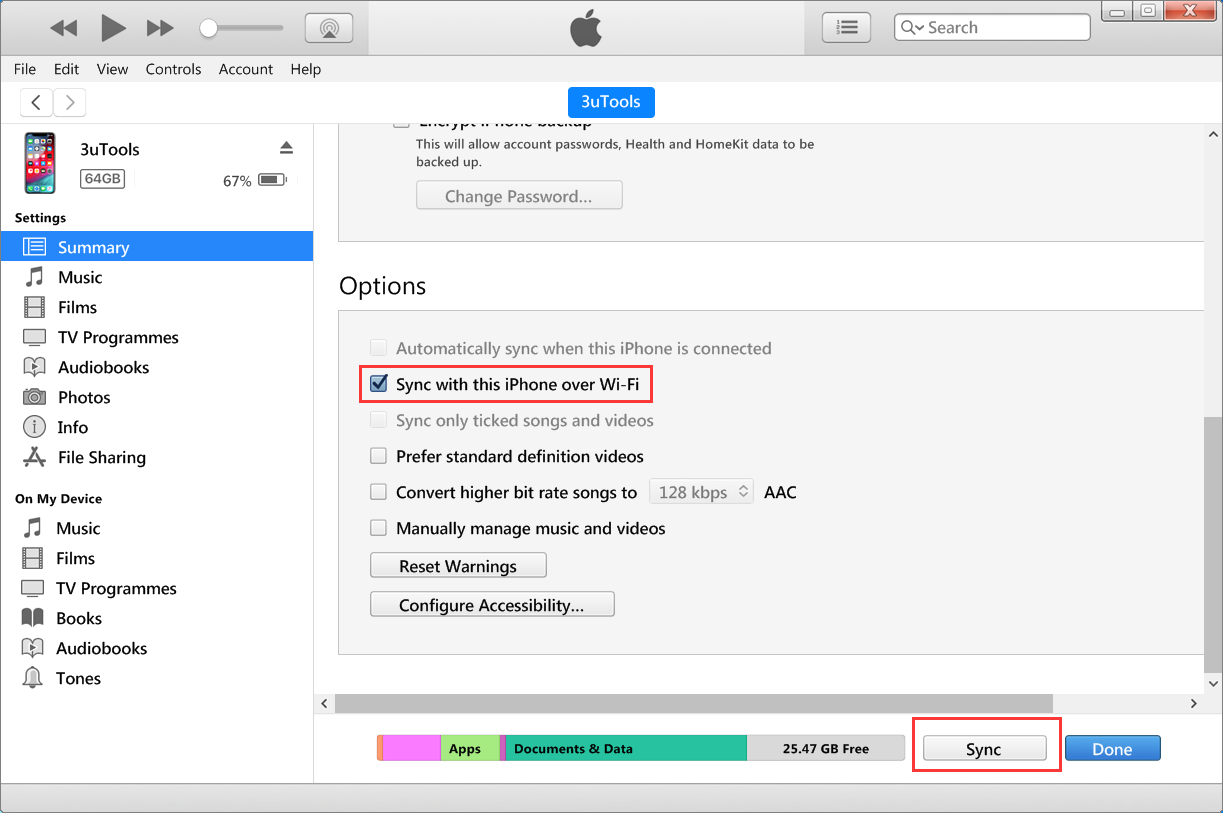
Step 1 The first time you connect iDevice to 3uTools over Wi-Fi network, you need to turn on Sync with this iPhone over Wi-Fi feature in iTunes.
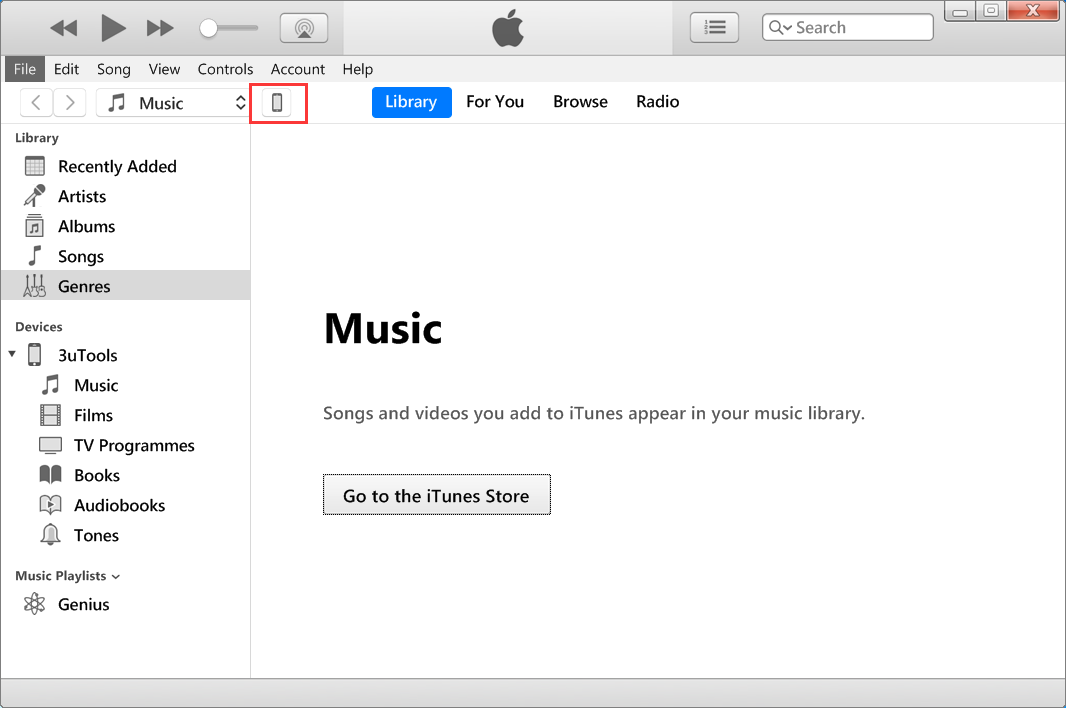
Connect iDevice to PC using the USB cable -> run iTunes -> click iDevice's icon.

Select the checkbox Sync with this iPhone over Wi-Fi and click Sync. Please wait for the sync process is done.
Tips: You can use the same way to disable Wi-fi connection in iTunes, just uncheck the selection.

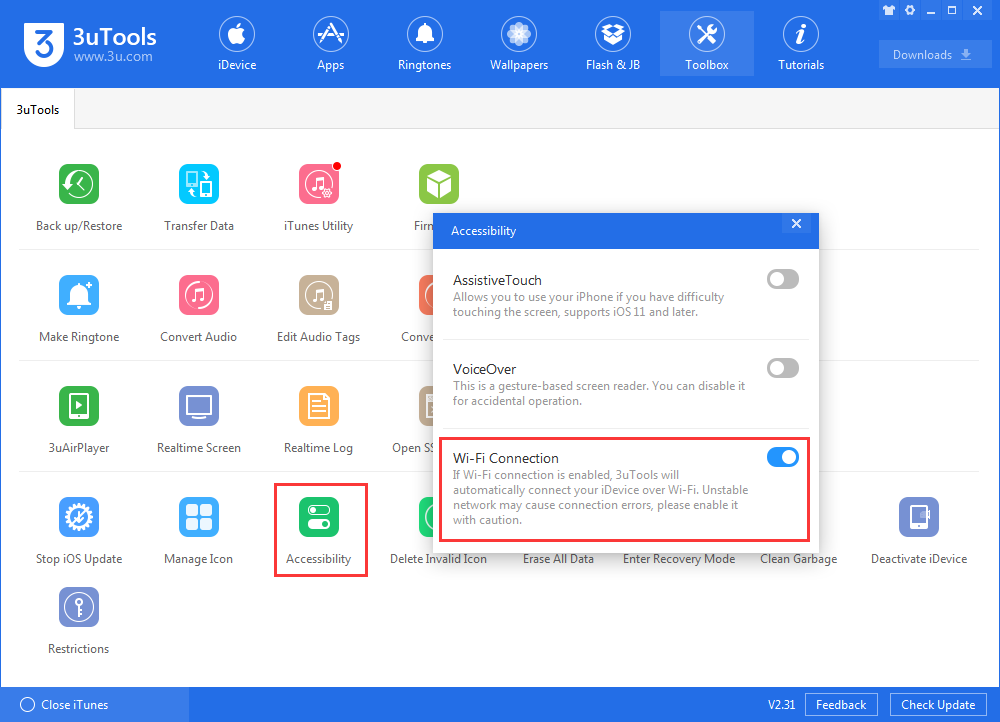
Step 2 Make sure your iDevice and PC share the same WiFi network, then head to Toolbox, turn on Wi-Fi Connection in Accessibility.

Step 3 Please restart your 3uTools after enabling Wi-Fi connection. At last, your iDevice should be connected to 3uTools automatically.
Please note again some functions are not available when your device is in Wi-Fi Mode. You are suggested to use an original USB cable to experience all features in 3uTools while Wi-Fi connection is not stable enough.

If you fail to connect, please check if the Wi-Fi network between your iDevice and PC are the same. You can also send your feedback with a screenshot so that our support team could help you out there.
Here is the video for you: