 855870
 2019-07-11
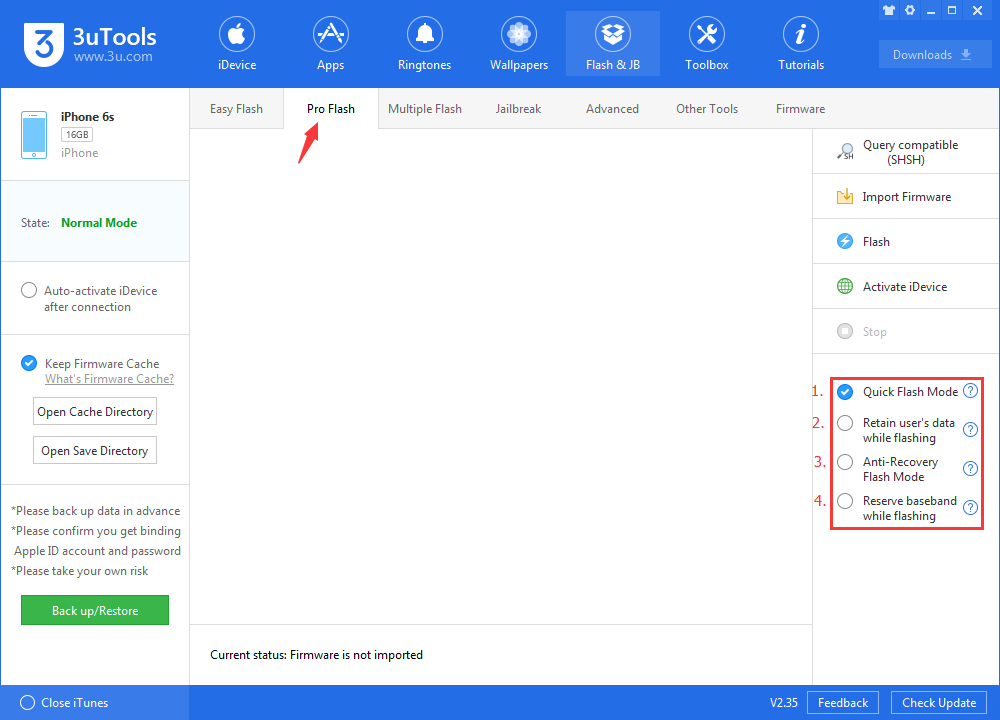
V2.35 3uTools has been released, and there are new flashing modes for your. When you flash your iDevice on 3uTools, 3uTools will automatically query SHSH. There are 4 flashing modes in Pro Flash, including “Easy Flash Mode”, “Retain User’s Data While Flashing”, “Anti-Recovery Flash Mode” and “Reserve baseband while flashing”.
“Quick Flash Mode”: This flashing mode is recommended for repairers, sales persons and normal users, cause it would allow users to update iOS system, erase user data, restore to factory state or fix iOS system.
"Retain User’s Data While Flashing": This mode can only help to update iOS system or restore fix iOS system, installed apps or users data would not be lost or changed.
“Anti-Recovery Flash Mode”: This mode is suitable for the users who want to sell their own iDevices or destroy personal data. As this flashing mode will low-level format your iDevice, the whole process will be slowly, and it probably takes several hours.
“Reserve baseband while flashing”: The base band version won’t be upgraded when you upgrade your iOS firmware, this mode is suitable for locked devices, no signal devices, and other abnormal devices... iPhone 3G/iPhone3Gs/iPhone4/ 1st iPad, iPod touch are supported, this feature is only available for iOS 7 and previous versions.
How to Pro Flash using 3uTools?
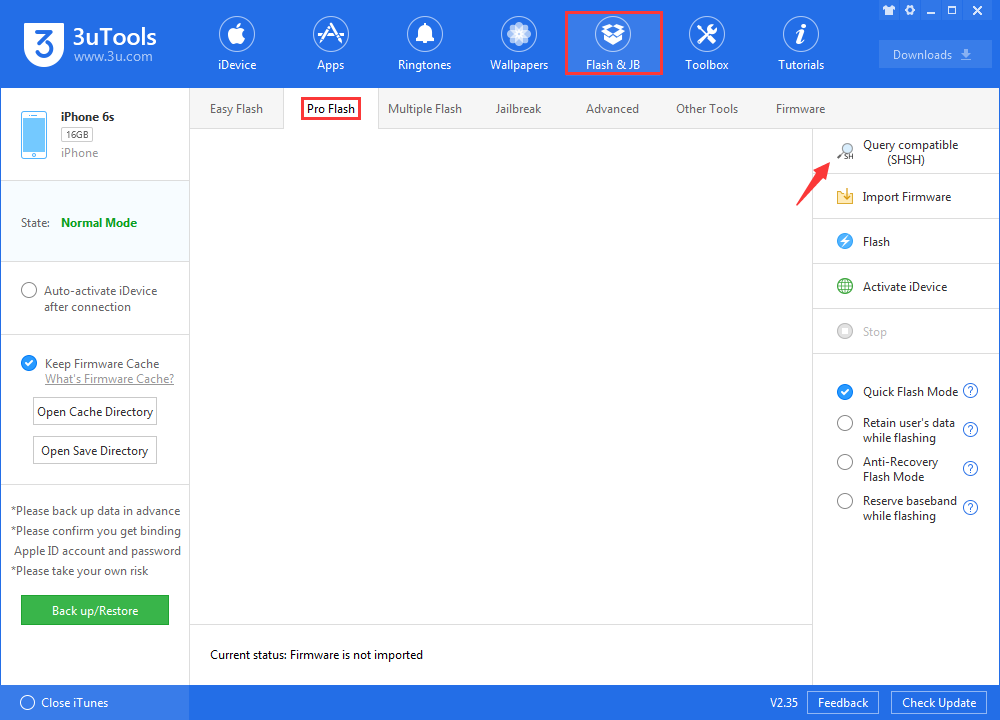
Step 1 Download and install the latest version of 3uTools, and connect your iDevice to PC. Navigate to Flash & JB → Pro Flash, and click Query compatible (SHSH) to know the signed iOS versions.
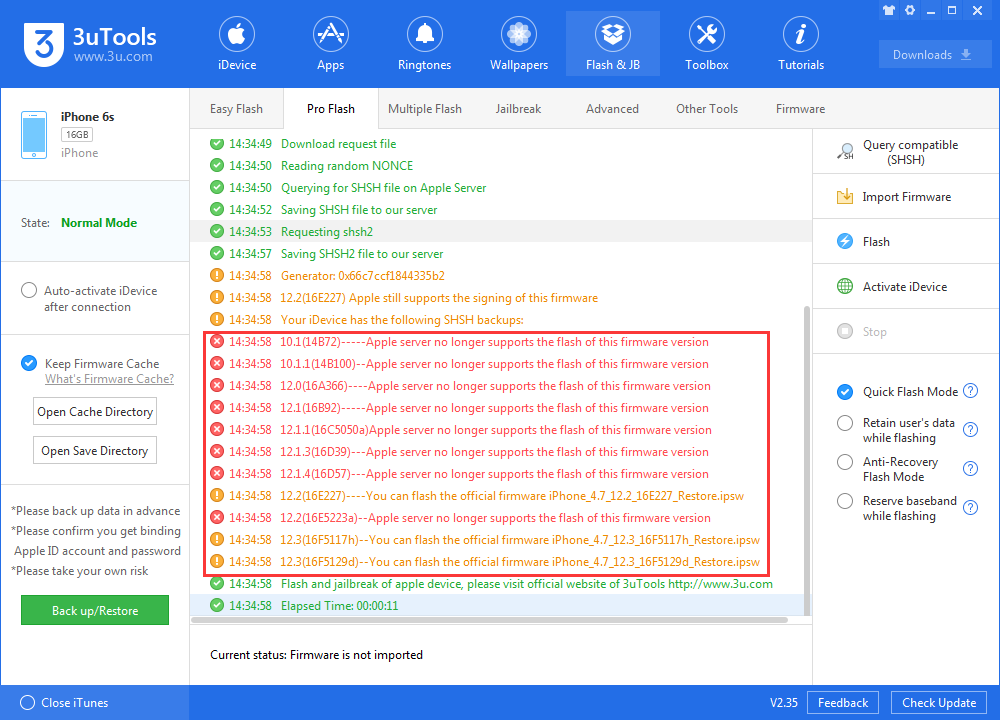
Step 2 Then download the signed iOS version you want to restore.
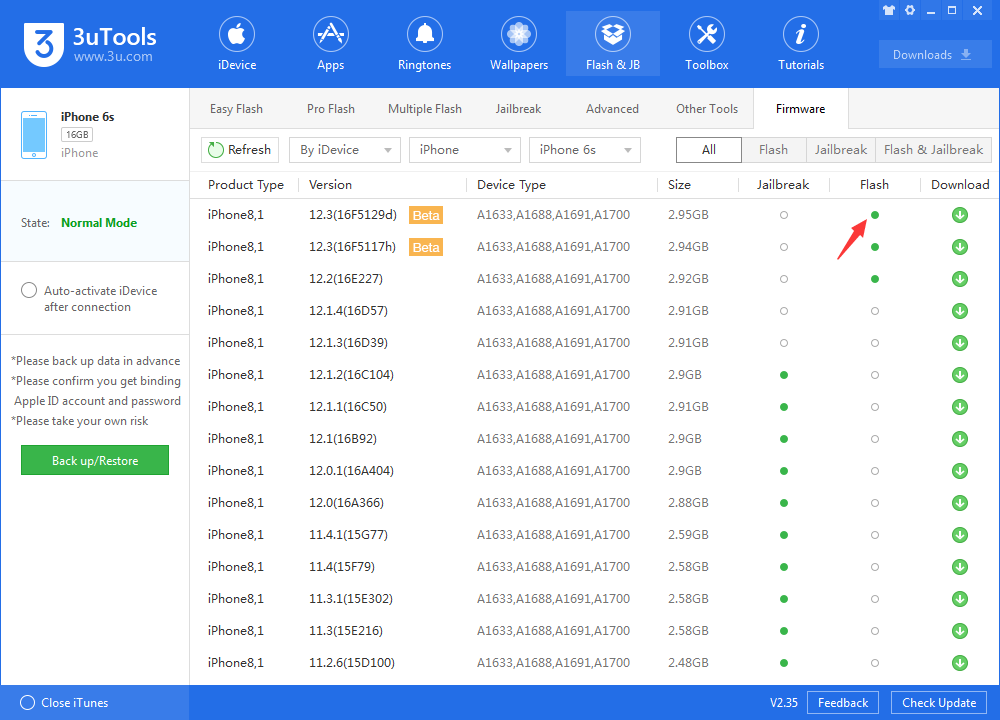
Step 3 After firmware is downloaded, you can go back to Pro Flash and import firmware.
After you import the firmware, please enter DFU on your iDevice and select falshing mode as you want.
1. Quick Flash Mode
Step 1 After you import the firmware and enter DFU mode, select Quick Flash Mode, and click “Flash” to the right.
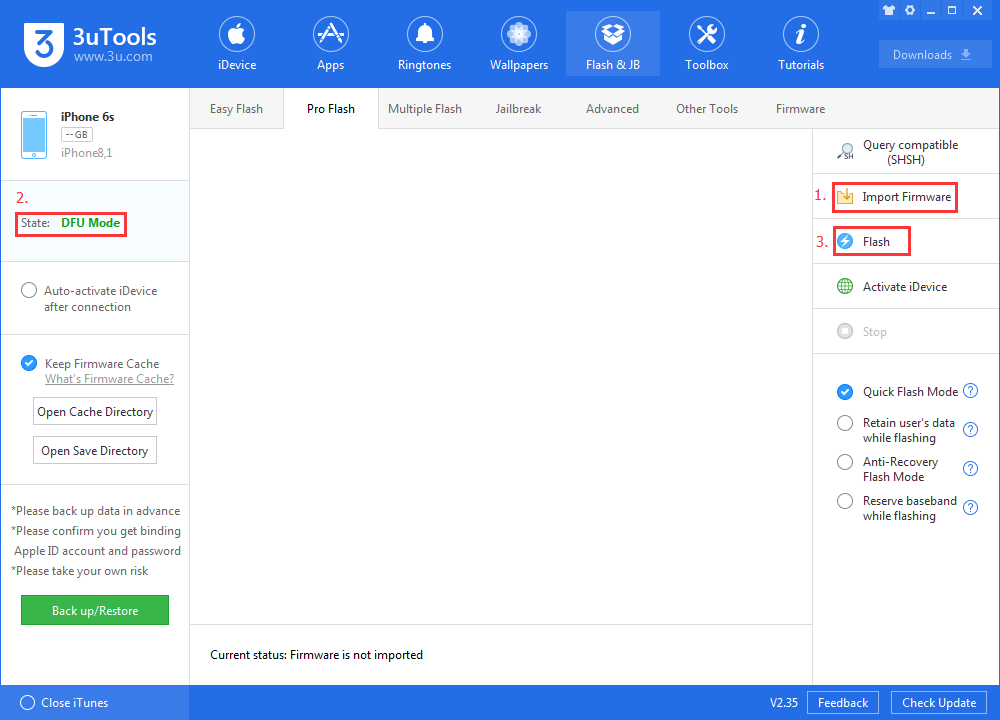
Step 2 Please wait until the process is finished, it would probably take around 10 minutes.
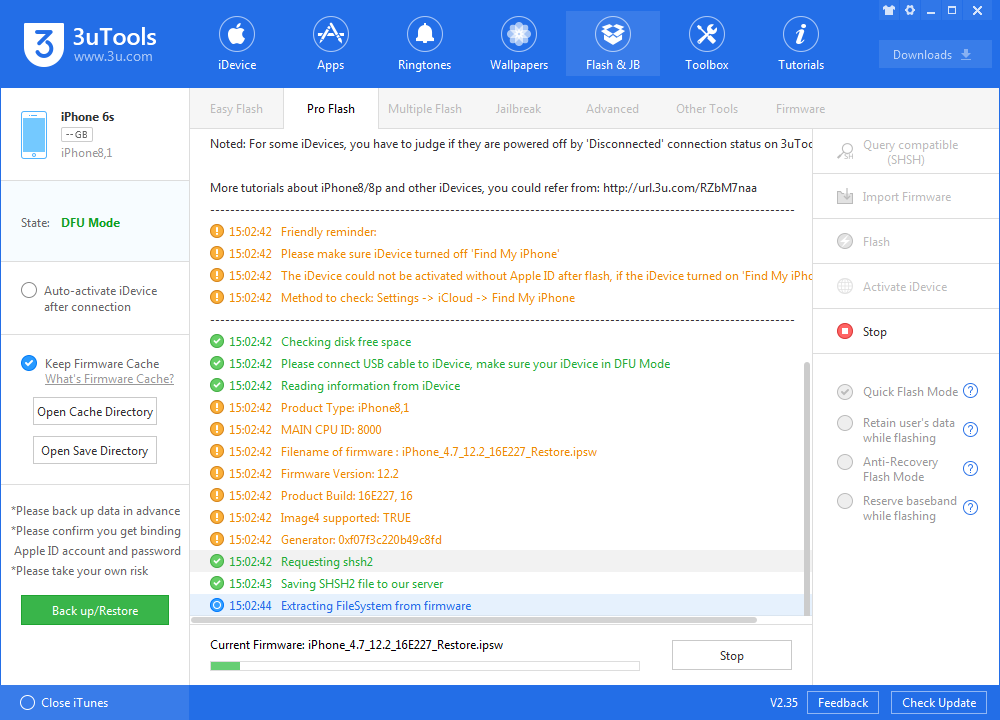
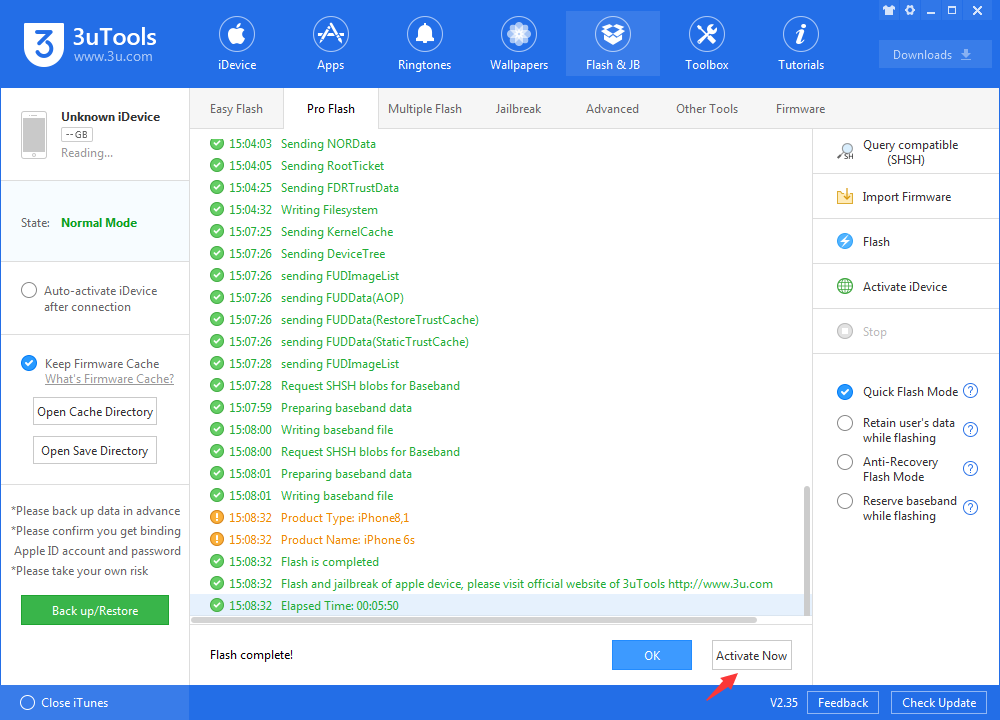
Step 3 iDevice will auto start after that, click “Active Now” to the right. (Or you can check the box on the left “Auto-activate iDevice after connection”)
2. Retain User’s Data While Flashing
Step 1 After you import the firmware and enter DFU mode, please select “Retain user’s data while flashing”. There will be a popup, read the reminder carefully and click “Yes” to start flashing.
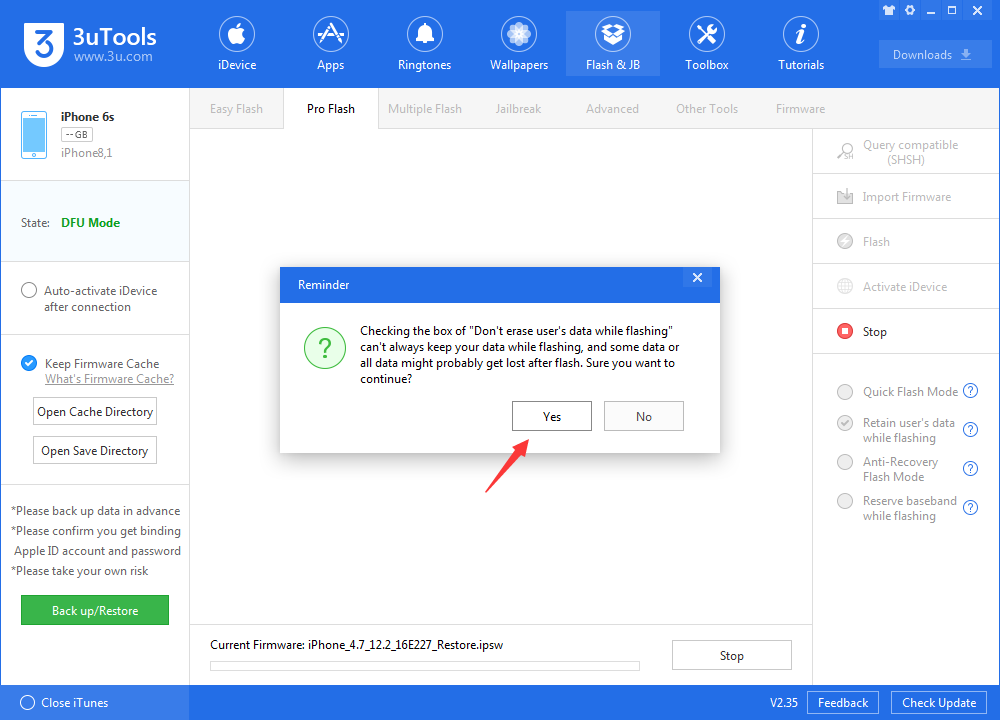
Step 2 After the flashing process is finished, you can just wait till the iDevice starts. (You don’t need to active your iDevice)
3. “Anti-Recovery Flash Mode”
Step 1 After you import the firmware and enter DFU mode, please select “Anti-Recovery Flash Mode”. Read the popup carefully before you flash.
Step 2 Click “Continue to flash in Anti-Recovery Mode”, and wait till the flashing is finished. It would take around 10 minutes.
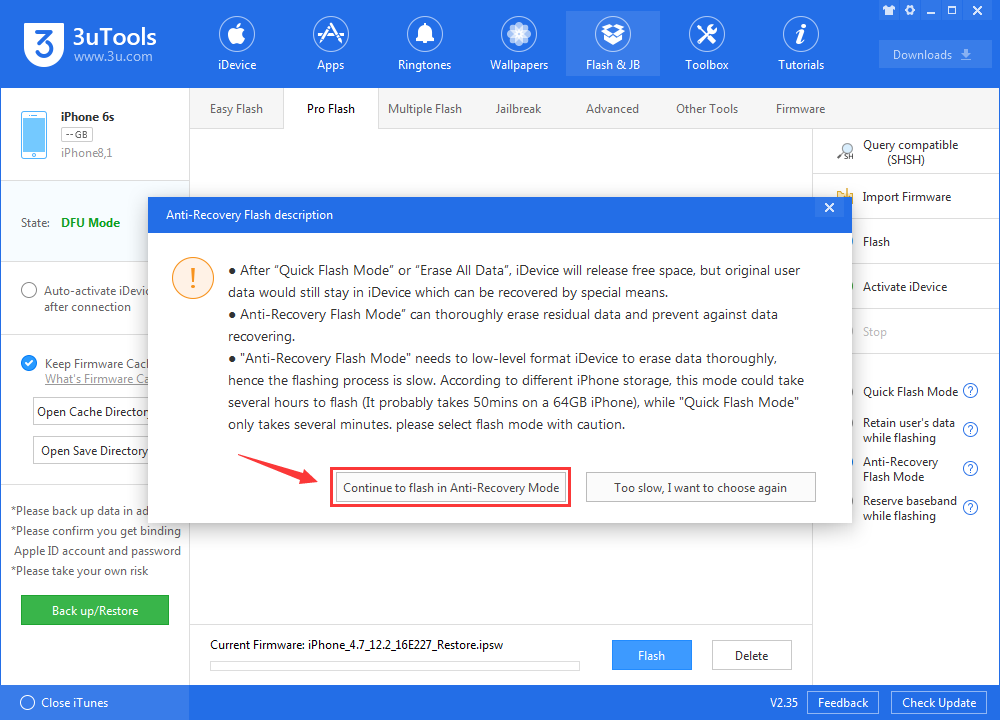
Step 3 After the iDevice reboots, 3uTools will deeply format your iDevice. (Please do not unplug your iDevice after flashing is finished)
Step 4 Please wait patiently for 3uTools to deeply format iDevice.
Step 5 After the whole process is finished, click “Active” to the right. (Or you can check the box “Auto-activate iDevice after connection” on the left )
4. “Reserve baseband while flashing”
Step 1 After you import the firmware and enter DFU mode, please select “Reserve baseband while flashing”, and click “Flash”.
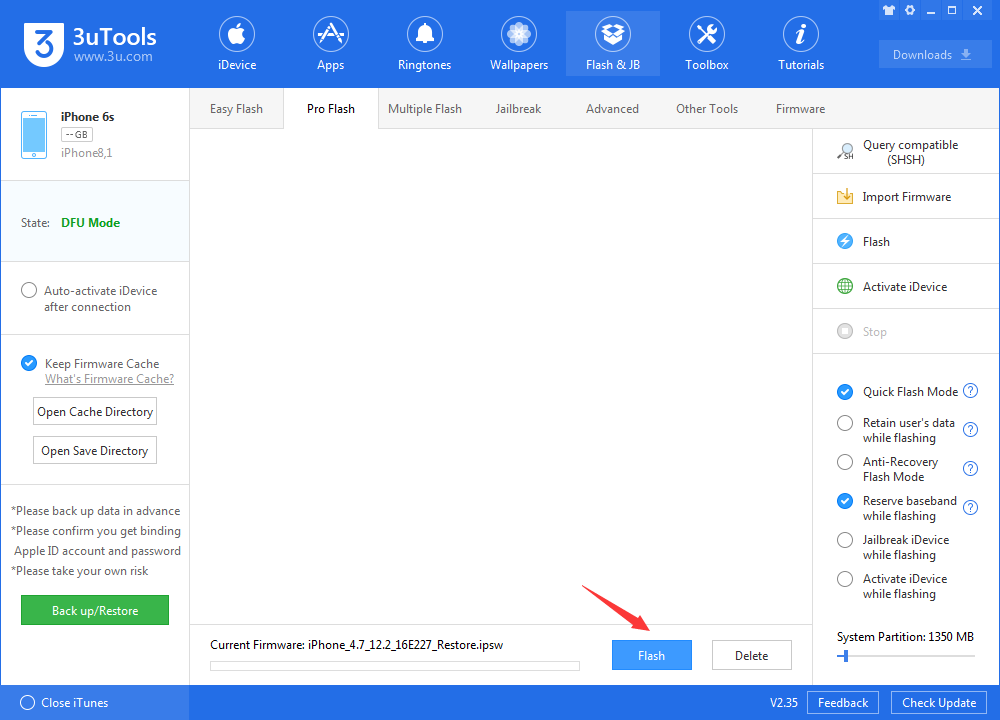
Step 2 Please wait till the flashing process is finished, it will take around 10 minutes.
Step 3 iDevice will auto start after flash, click “Active” to the right. (Or you can check the box on the left “Auto-activate iDevice after connection”)