 5095
5095
 2017-09-28
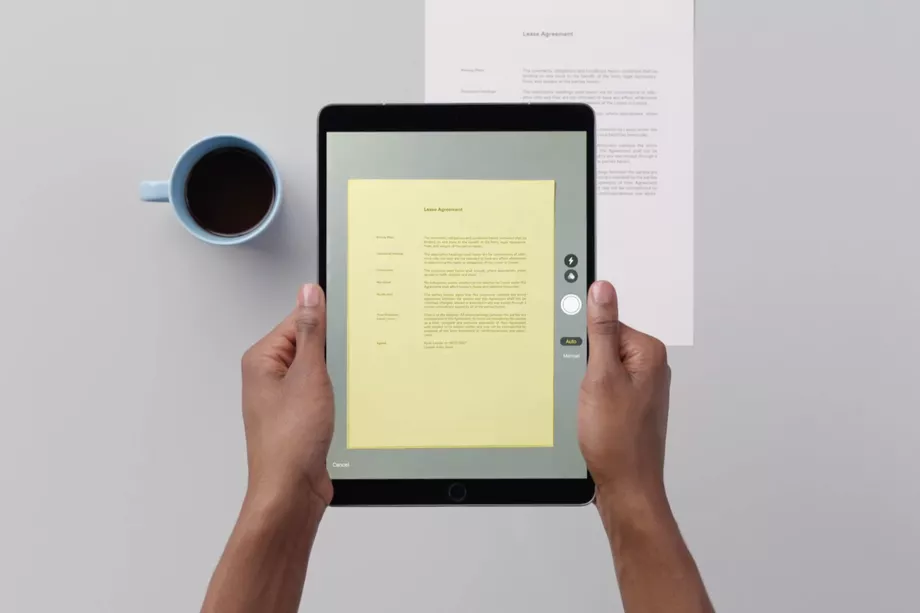
One of the most useful tricks in Apple’s iOS 11 update is found inside the Notes app: it’s a document scanner.

Steps
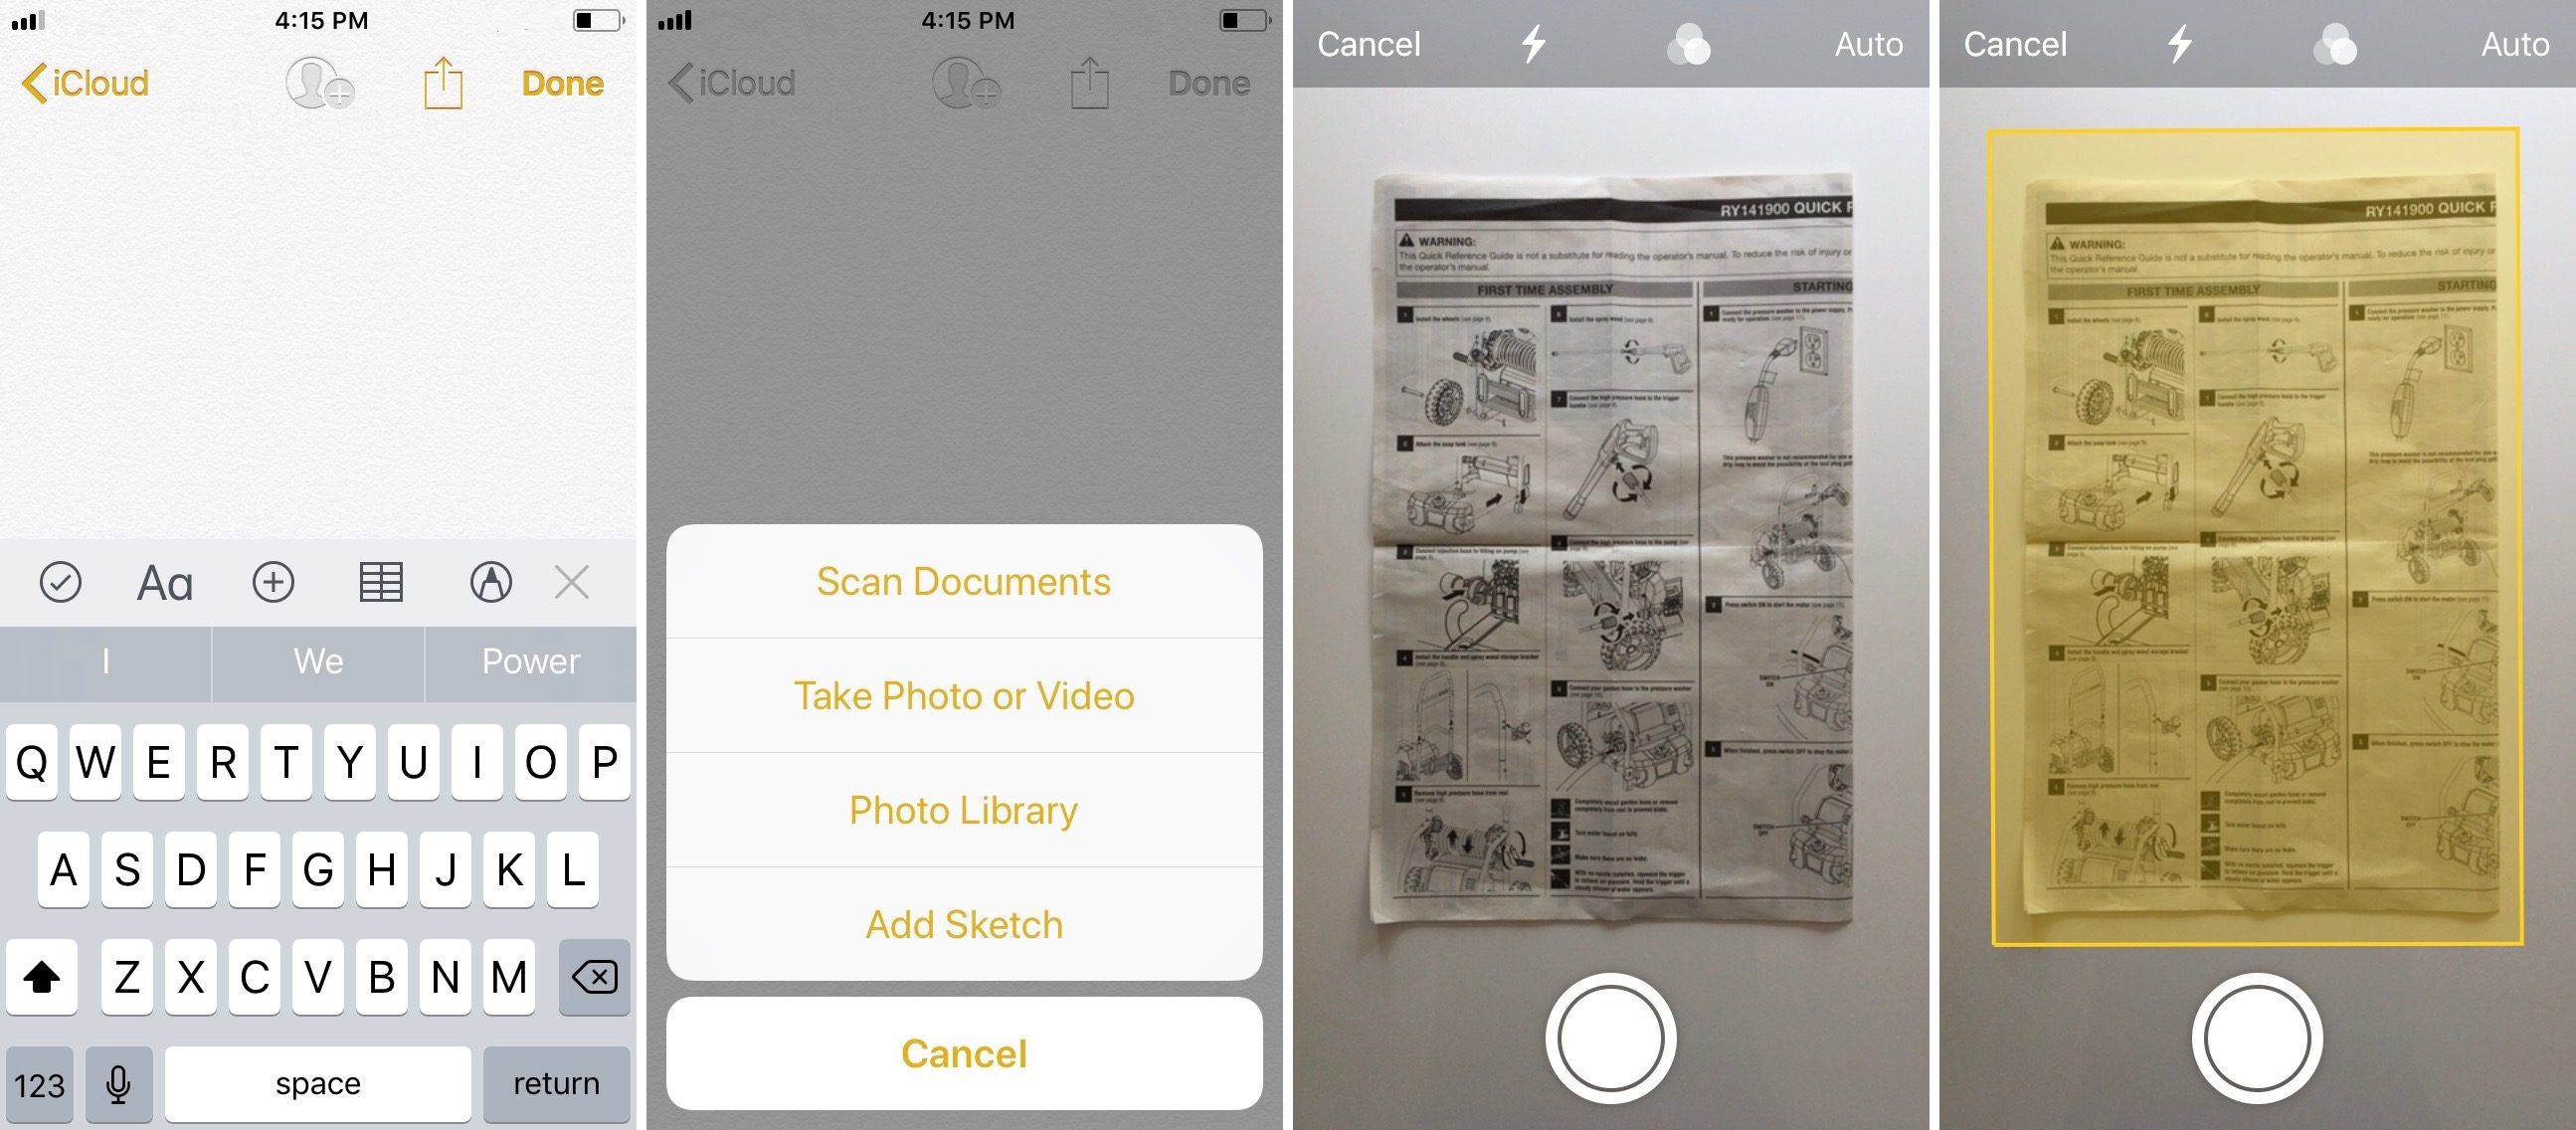
1. Open a new or existing note.
2. Tap the + icon and tap Scan Documents.
3. Place your document in the camera’s view.
4. Use the shutter button or one of the volume buttons to capture the scan.
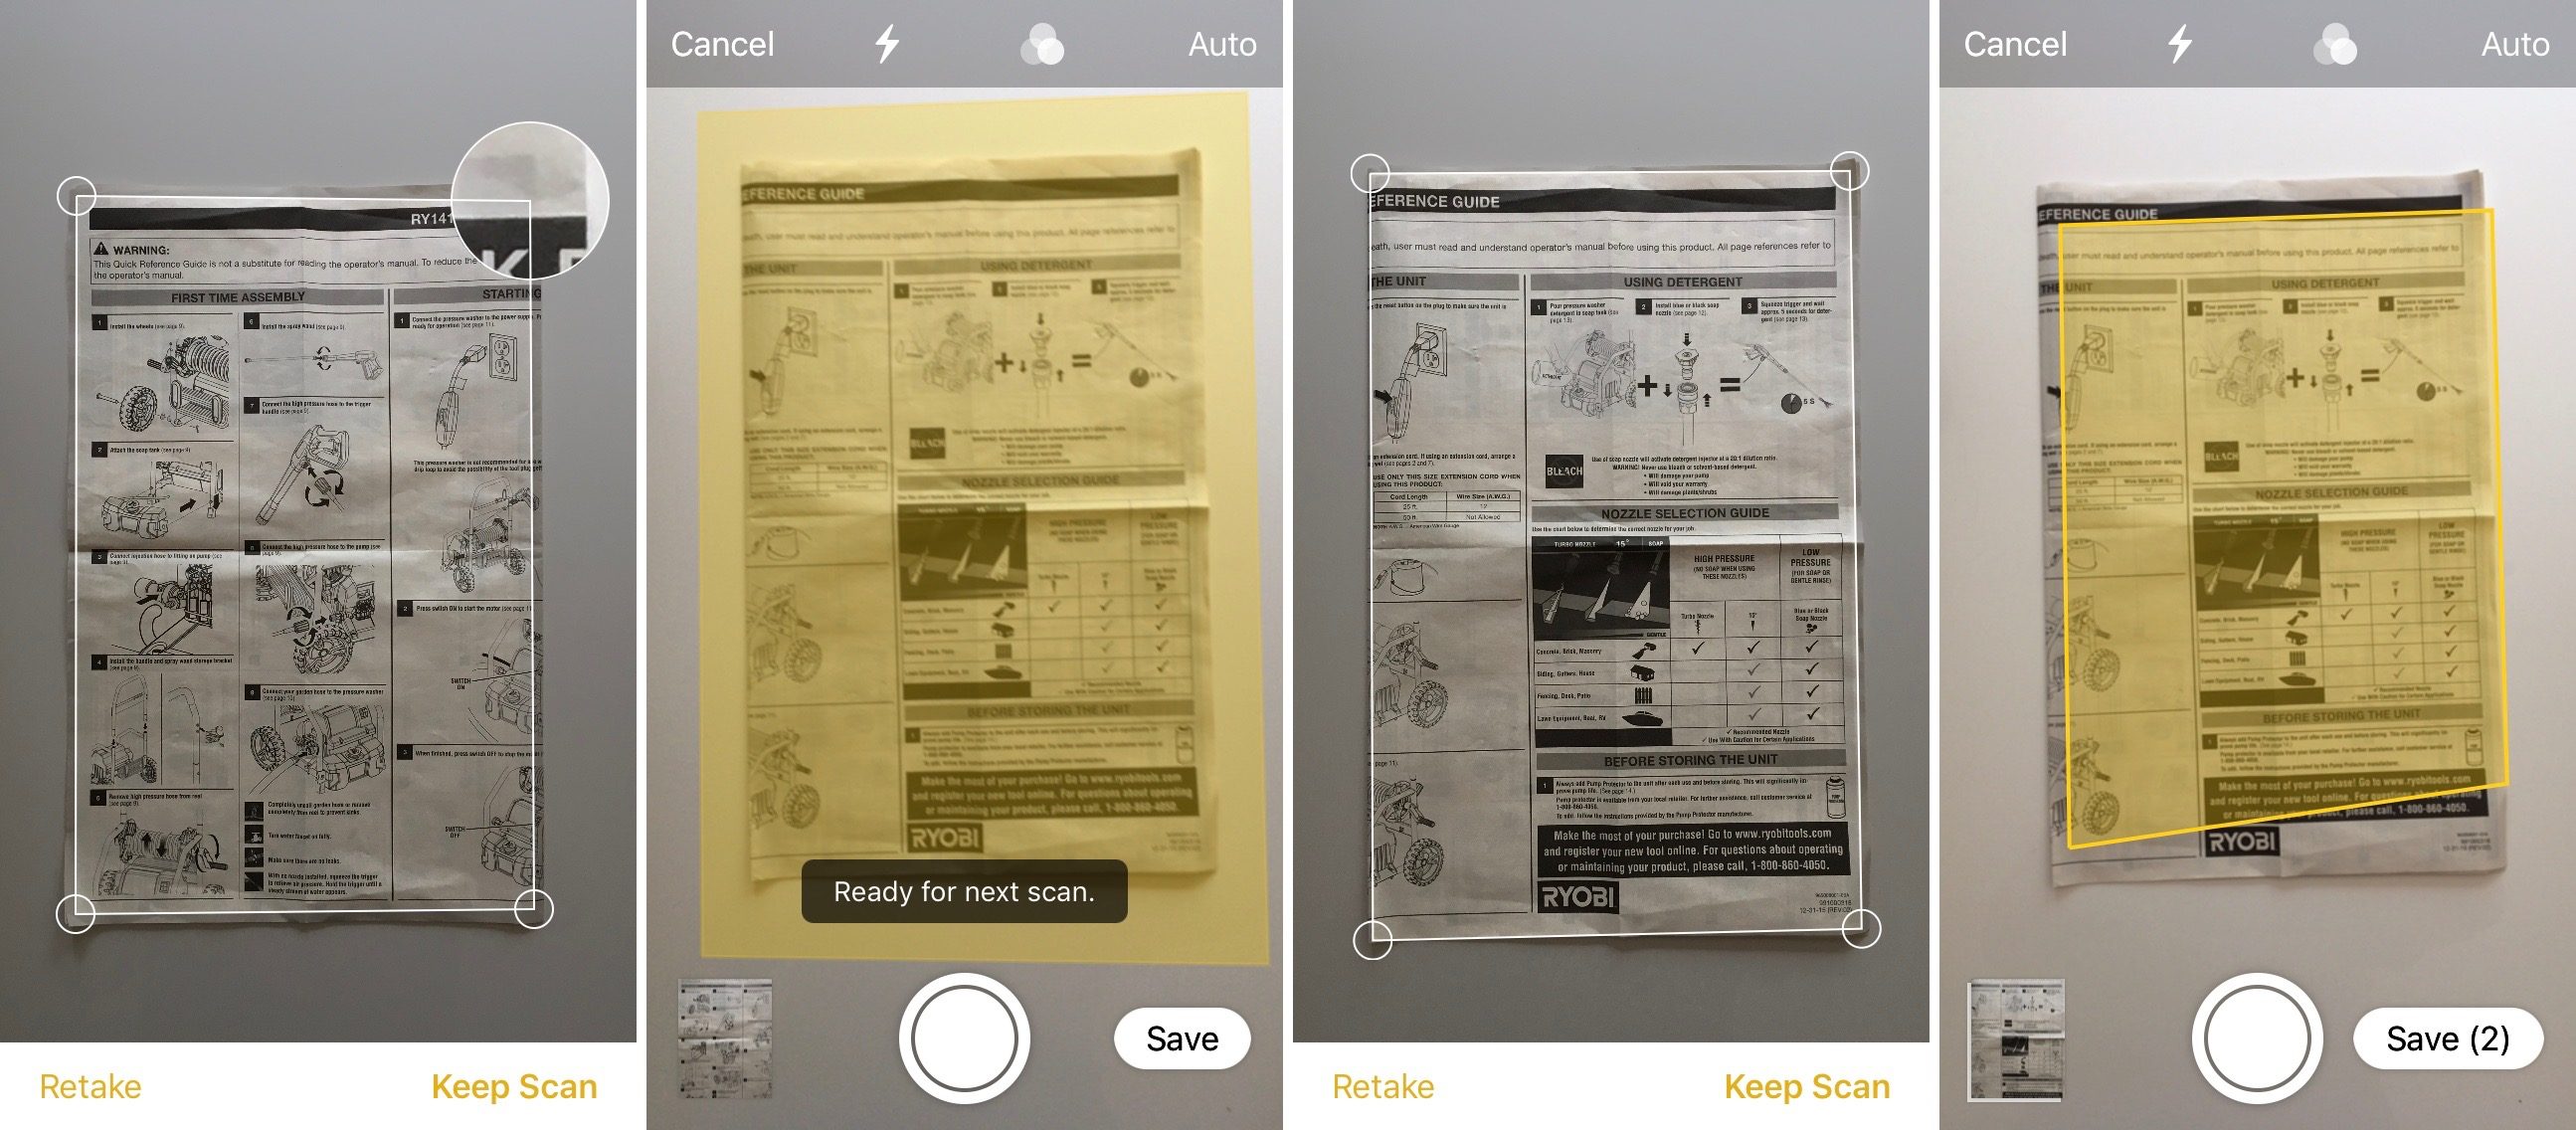
5. If needed, adjust the corners of the scan by dragging, then tap Keep Scan.
6. Tap Save when finished scanning or continue on to add more pages.

This feature works really nicely for any size document, but is especially handy for large documents that can be goofy to scan with a traditional scanner. It seems to be easiest to adjust the frame of the scan by tapping a bit away from the magnifying glass in each corner and then dragging.

You also get the option to use the camera flash and filters when scanning.

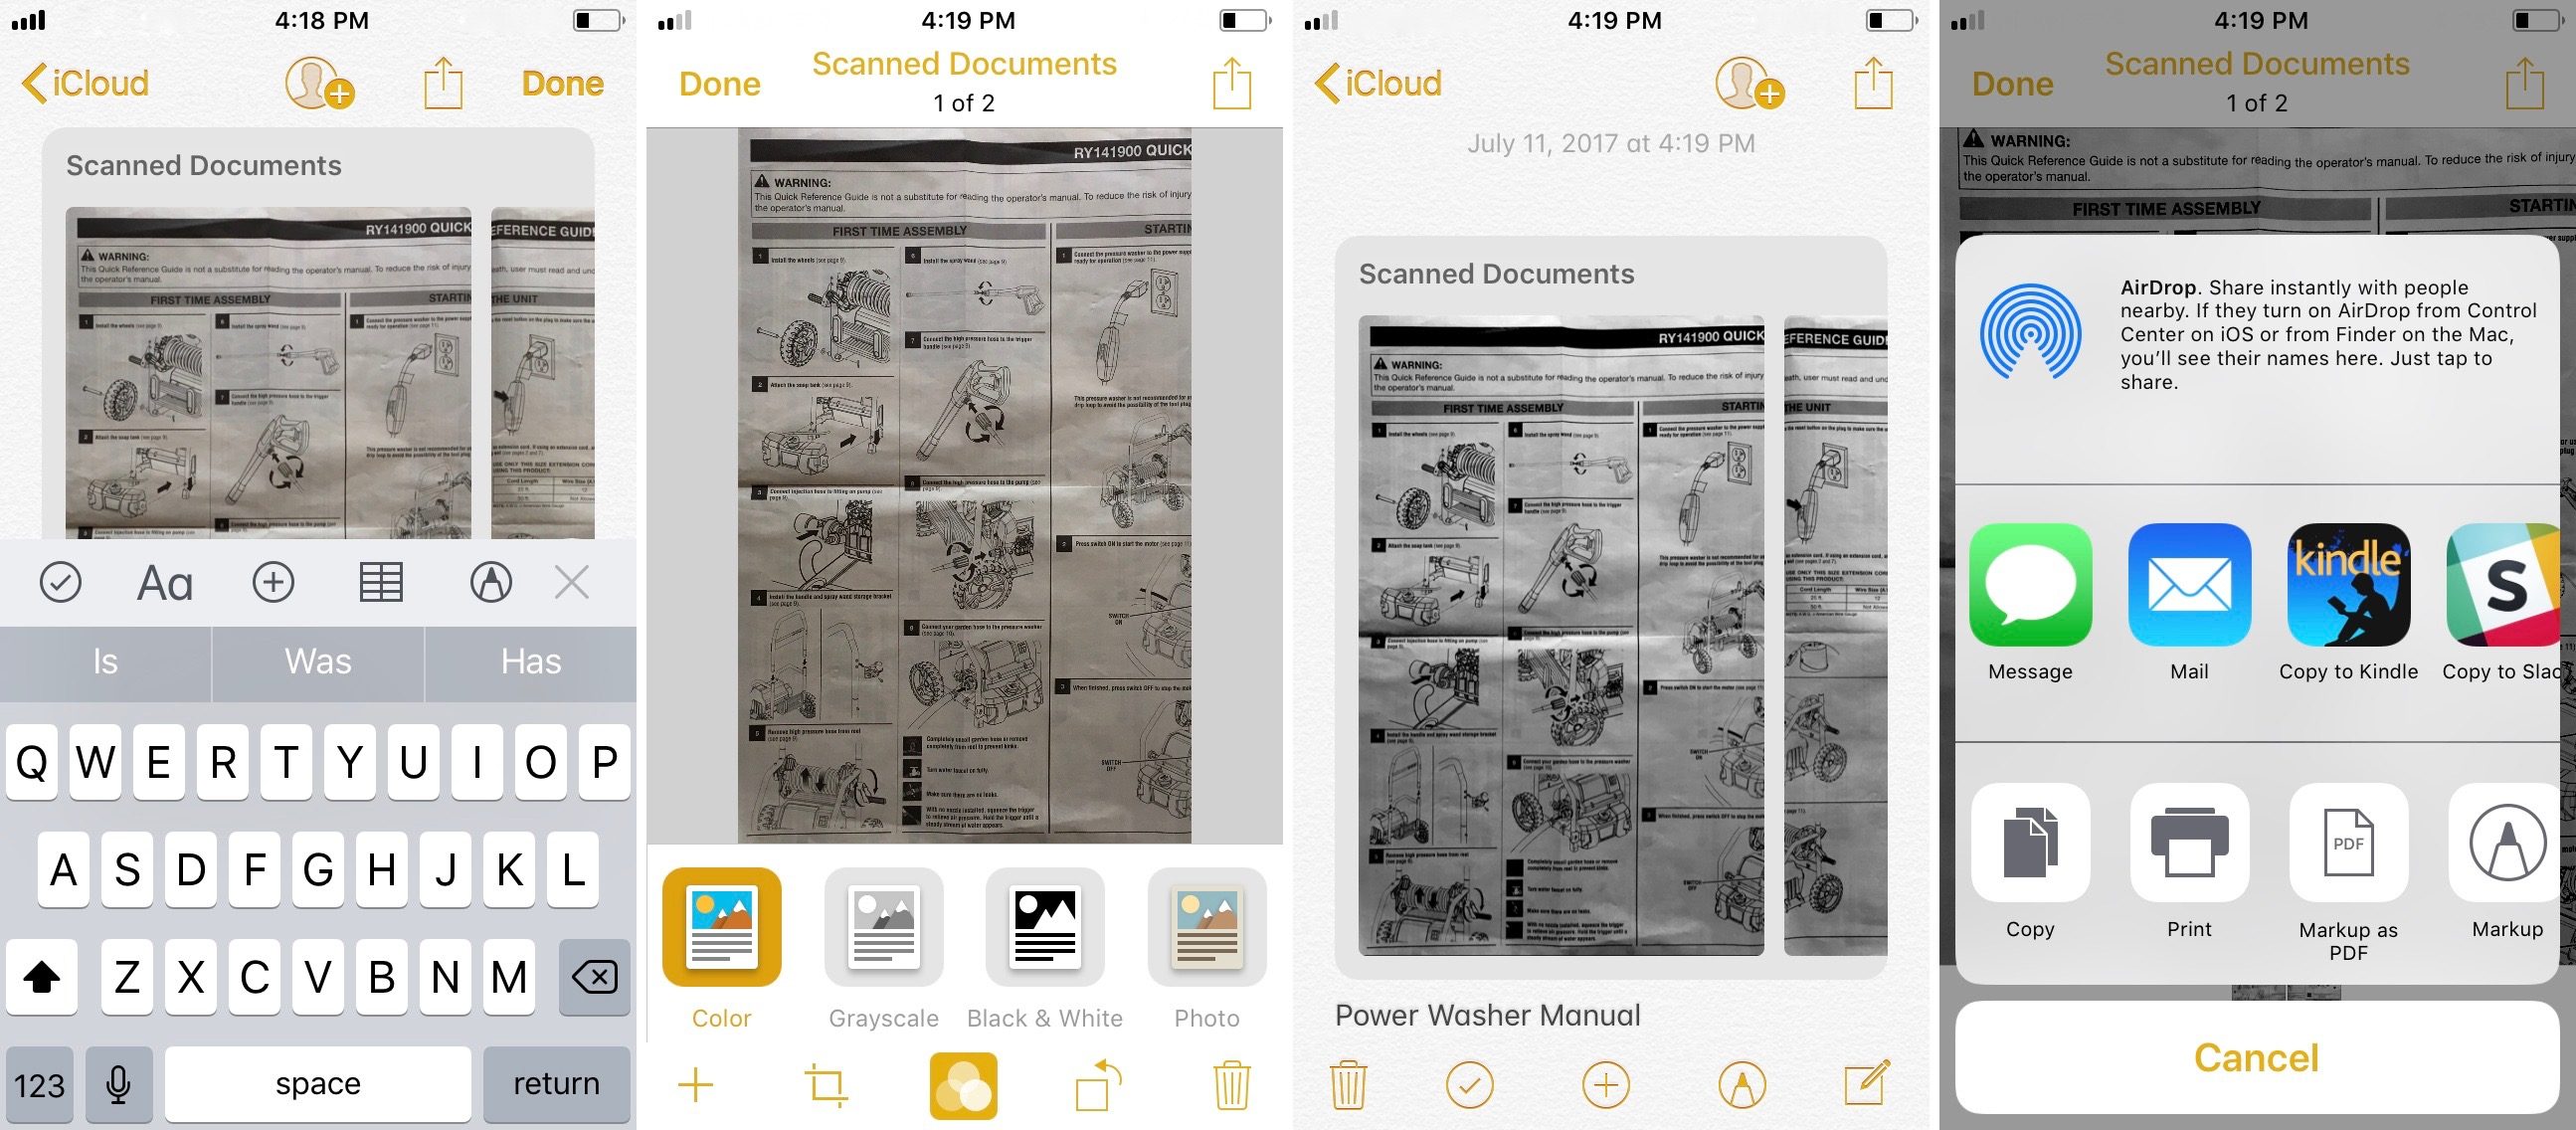
You can also edit your documents after you’ve scanned them. Tap on your scanned docs to bring up the editing toolbar to add more pages, change the filter, rotate, and crop.
Tapping the share button from within the scanned docs will allow you to markup, markup as PDF, print, copy, and share.